I Happen to be an Artist.
41 stories
·
3 followers

Modding NES Games for Fun and Art. Part 1: Super Lupo Bros.

1 Comment
Modding NES Games for Fun and Art. Part 1: Super Lupo Bros.

Old games for the Nintendo Entertainment System can be lightly hacked in order to change the sprites, sounds and more. My first hi-larious project was to insert myself in Super Mario Bros.


Wait, but why do this?

The impetus for this project was to take an example from my childhood video gaming experiences and insert my childhood back into that game. To that end, I edited a rom of the original game, in order to swap the Mario sprite with one that more closely resembles me. For the exhibition Galaxy Champion FUN ZONE, the modified version of the game was loaded onto a cartridge and made playable in a real NES system. This was an important aspect of the project, as I wanted the sense of playing the game to fit into a player's memories and feelings of nostalgia. In it's presentation, the installation explicitly referenced a home gaming environment, in order to help facilitate a gallery goers participation with the game.

The work of figuring all this out led to a number of interesting processes: sprite editing, palette swapping, title editing, and chip flashing. So, this blog post and the next is an attempt to corral all of this information in one place, not really to make a "how-to" guide, but to leave a strong trail of breadcrumbs for anyone else (or future me) who wants to do the same thing.

But What's a Sprite Though?

In terms of the NES, a sprite is just a drawing composed of a set of 8 by 8 pixel tiles. Each sprite-group can only use 4 colours, with one of those colours used for transparency. Each character in the game uses a combination of tiles to draw and animate their movements, for example: a Goomba's sprite is composed of 4 tiles stacked two rows high and two columns wide. When the Goomba walks across the screen, the sprite is flipped to animate a walking motion. For Mario things get a bit more complicated...Mario runs, jumps, crouches, swims, and becomes Super! Each of these actions need to be animated on screen in some way, while keeping within the NES restrictions on colour use and rom storage space.

For my Super Lupo Bros. project, an important part was to switch the Mario sprite into something that looked a bit more like me. But how do you change graphics in a game that already exists? To figure out this process, this youtube video by John Riggs was very helpful. Riggs demonstrates how all of the Super Mario Bros. cart data in the NES rom can be inspected visually using a program called Tile Layer Pro (TLP). Using TLP, the sprite data can be viewed and edited, allowing you modify the existing graphics. To get a sense of what is involved, take a look below to see how I've changed the Mario sprites to Max sprites:

Modding NES Games for Fun and Art. Part 1: Super Lupo Bros.

In the gif above, the left side shows the first four tiles which compose Mario's upper torso, and the right side shows a sample of the subsequent tiles used in the game. Note that the whole graphic is made from screengrabs of Nixel, a browser based sprite editor. Luckily, in the Super Mario Bros. rom, the data for the sprites is in a pretty logical order: just about all the tiles for the Mario sprites are aligned left to right, head to toe.

My edits are mainly centered around slimming Mario down a bit, while getting rid of Super Mario's overalls and his giant nose and moustache. Though, for Little Max I left the overalls in to make him seem more like a kid version of Super Max. Oh yeah, and I made my pants pink by swapping the palette used, a process I'll describe in part 2. Below is what this looks like in action:

Modding NES Games for Fun and Art. Part 1: Super Lupo Bros.

There are a few more details throughout the game (not all pictured in the above graphic): my name is inserted at the top of the screen, the mushrooms are now gameboys, the ivys are tomato vines, the fire flower is a fire pizza, and a few more switches/insertions. Overall, the total amount of graphic data in the original game is very limited...if you noticed, the clouds use exactly the same sprites as the shrubs, so as a result the total visual character of the game feels familiar. I stayed away from making bigger changes, like changing the layout of the levels, because I wanted the game to be played in a way that closely matches a player's muscle/nostalgia memory of the game. In this way, Super Max is a drop in replacement for all your childhood gaming memories!

Title Swap

The first thing a player sees when booting up the game is a fun and inviting title screen. Changing this screen was a high priority, but at first it seemed a little difficult. The Super Mario Bros. cart is so resource constrained that the title screen does not exist anywhere in the cart as a single cohesive graphic; instead, it is assembled from various reused tiles. The most common process for editing the title relies on a program called SMB Title Editor, but the text in the application is garbled due to the unlocalised font rendering of Japanese characters.

Luckily, John Riggs has another youtube video that perfectly explains how to use the application. Following that guide it is easy enough to make your custom title! As an additional note though: if you do want to edit the title of the game, you must start with a rom that has not been modified in any other way. Meaning, in your Super Mario Bros. rom hacking endeavours start with editing the title before making any other modifications, otherwise it will fail to apply your changes.

Modding NES Games for Fun and Art. Part 1: Super Lupo Bros.

Playing the Game

So, editing the game is fun, but what are the options when it comes time to play the thing? Of course, there is no shortage of emulators which make it possible to play the game on a computer, but that wasn't quite enough for this project. I wanted the tactile experience of playing the game to perfectly match a player's expectations and muscle memory. That meant I had to find a way to get the modified rom onto a cartridge that could be put in a real NES system.

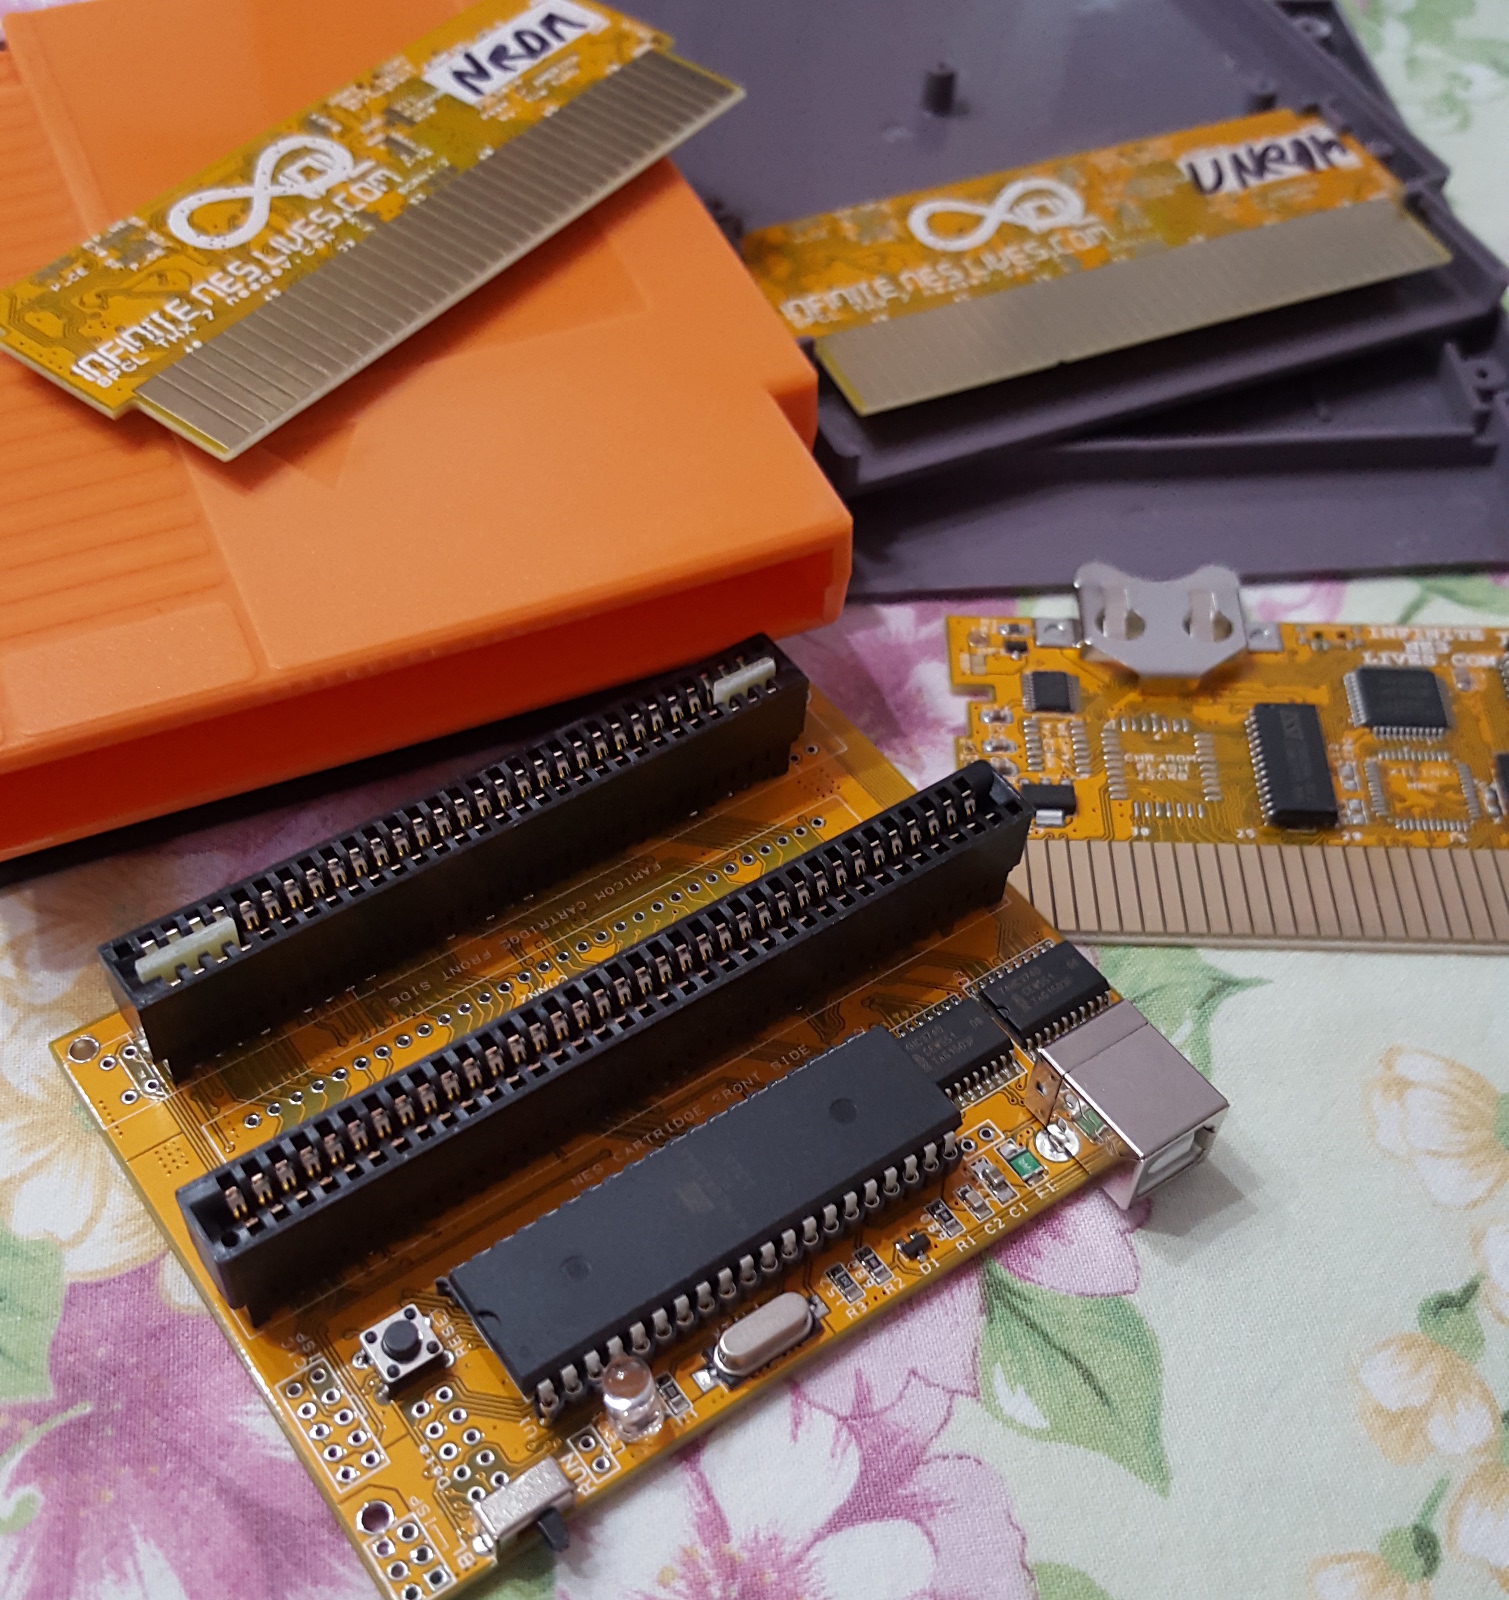
There are a few options for this, but the one I settled on was using a new blank cartridge, and flashing/programming it with my custom rom. There is what's called a "kazzo cartridge programmer dumper", a version of which can found here as sold by a delightful company called INFINITE NES LIVES.
Modding NES Games for Fun and Art. Part 1: Super Lupo Bros.

The product they sell is based on this specification, which includes functionality to program cartridges. So, in the case of Super Lupo Bros., I just needed to acquire the blank cartridge with the correct memory layout, and then use the hardware to program the cartridge with my modified game.

The final result is a game that (should) be playable in a regular ol' NES system! Below is the installation image, as seen in the exhibition Galaxy Champion Fun Zone.

Modding NES Games for Fun and Art. Part 1: Super Lupo Bros.

And that about sums it up for Part 1! As I said, this was not really a how-to guide by any stretch--but hopefully this serves as a good collection of links to relevant resources if you take up a similar project.

The "Part 2" post will touch on palette swapping, using a hex editor to change in-game text, and how to permanently apply game genie codes. These will be touched on as I go through the process of documenting the other game I modded: Dante's Inferno.

Read the whole story
mlupo
2478 days ago
reply
A fun little project from last fall :)
Canada
Share this story
Delete

Beep-Boopatronics, the performance and installation

1 Comment
Beep-Boopatronics, the performance and installation

This project reflects an obsession with wires, communication, and out-of-date consumer products. In order to do so, this installation explores systems of translation and adaptation by dismantling objects which are on the outer edge of their usable life and imbuing them with new, but not always useful, functionality.

Beep-Boopatronics, the performance and installation

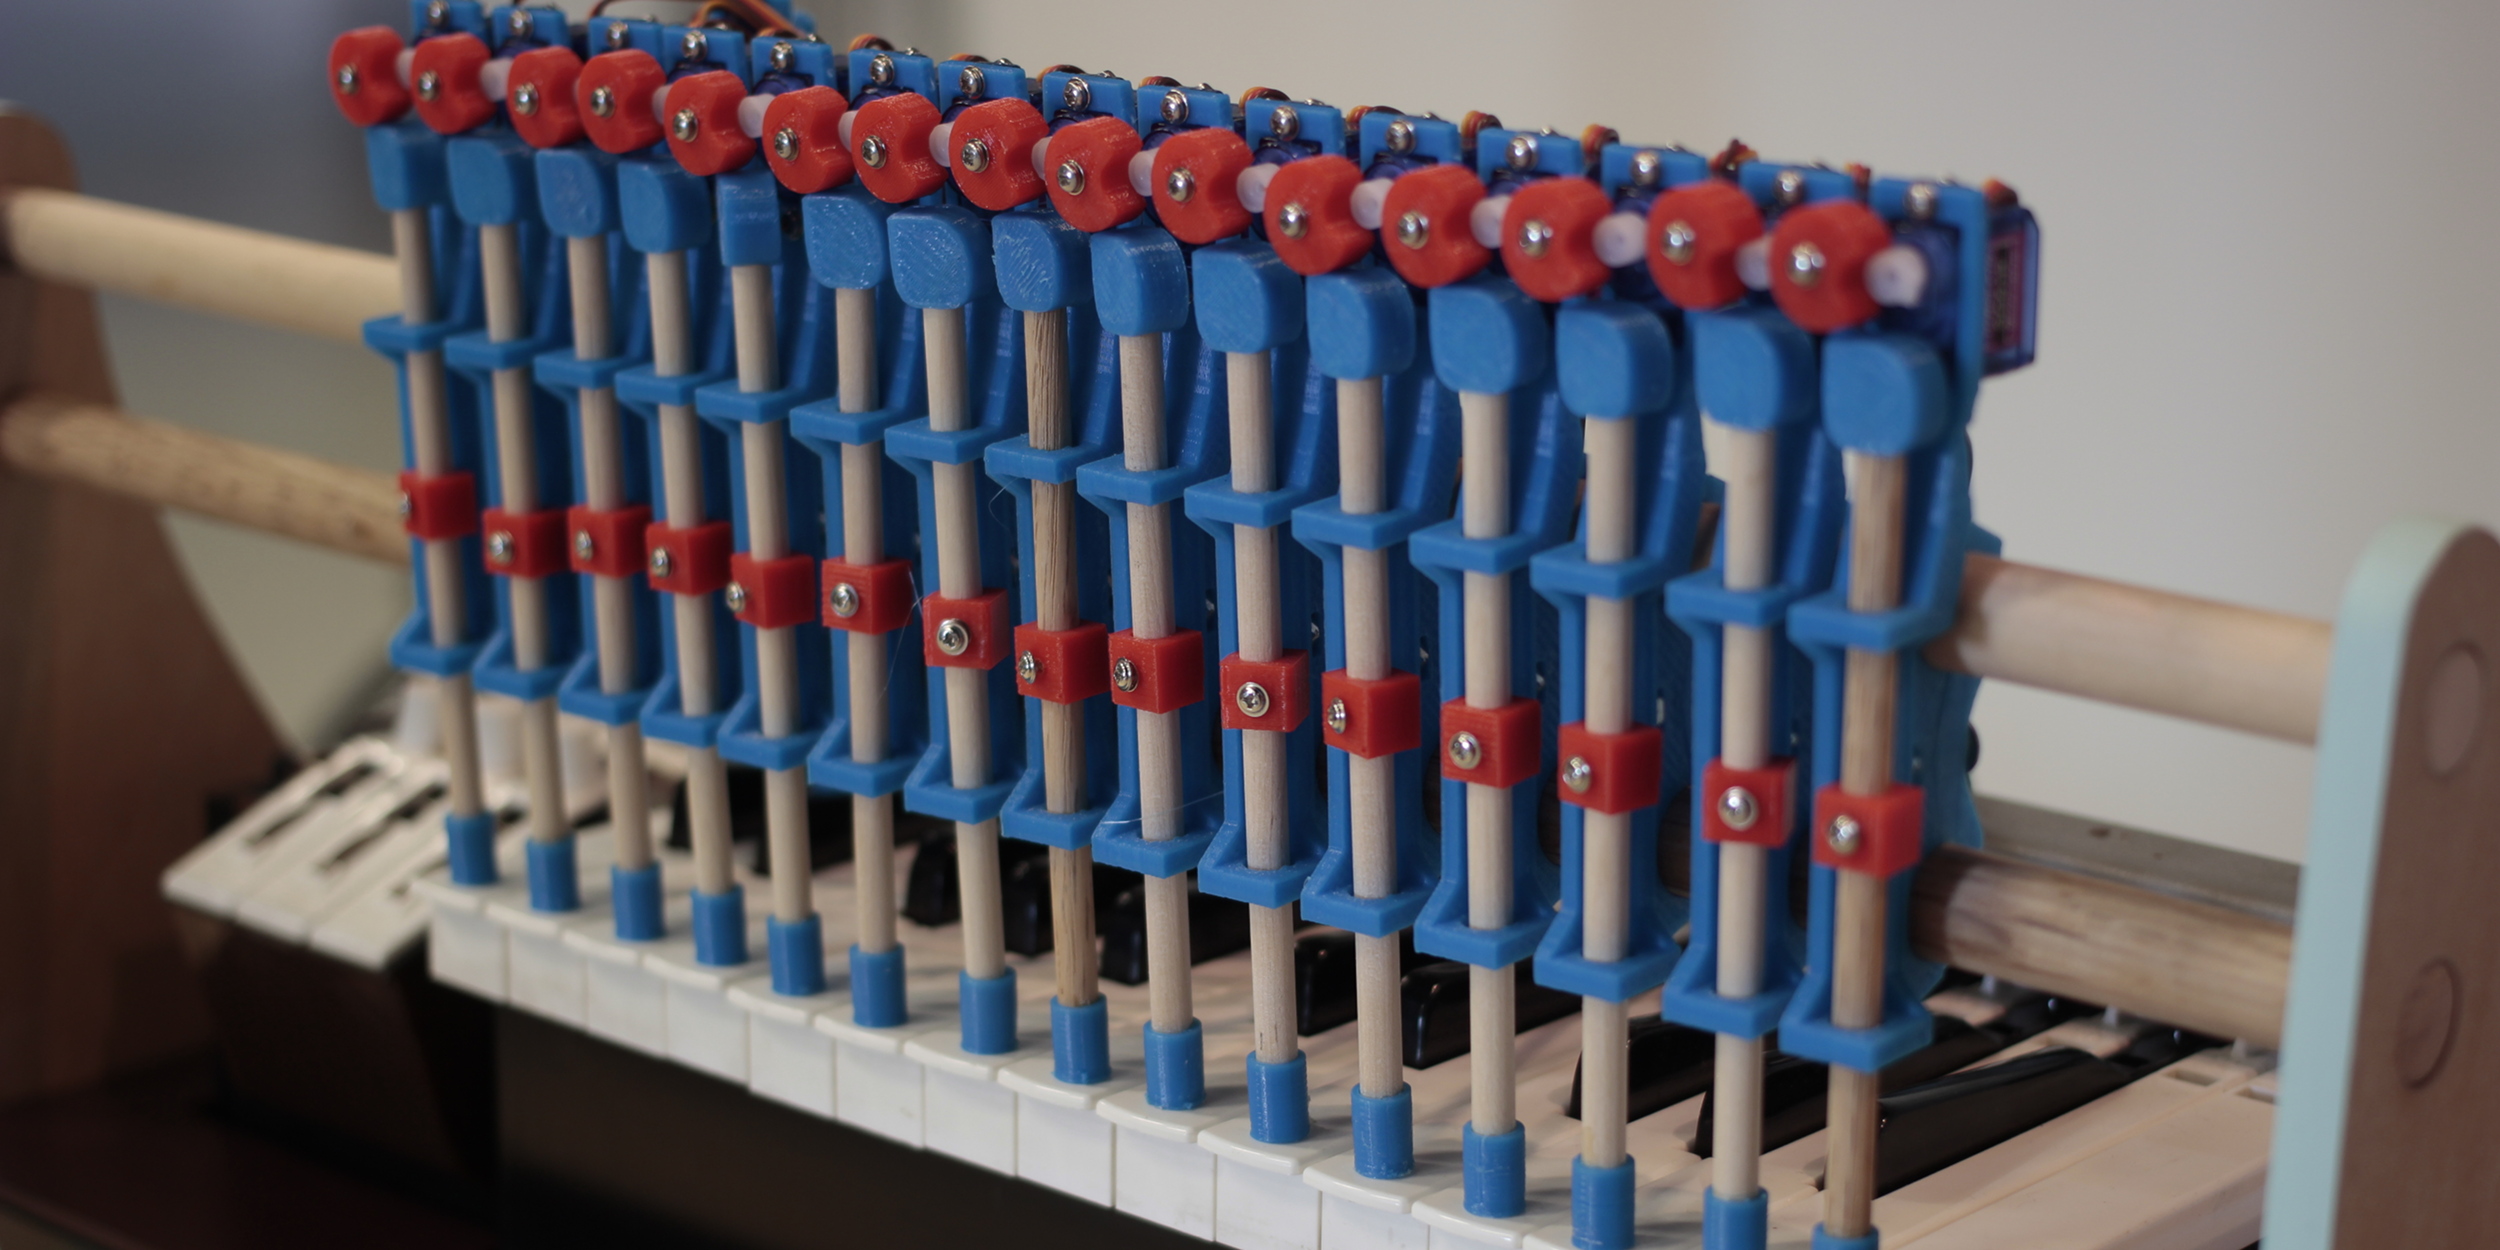
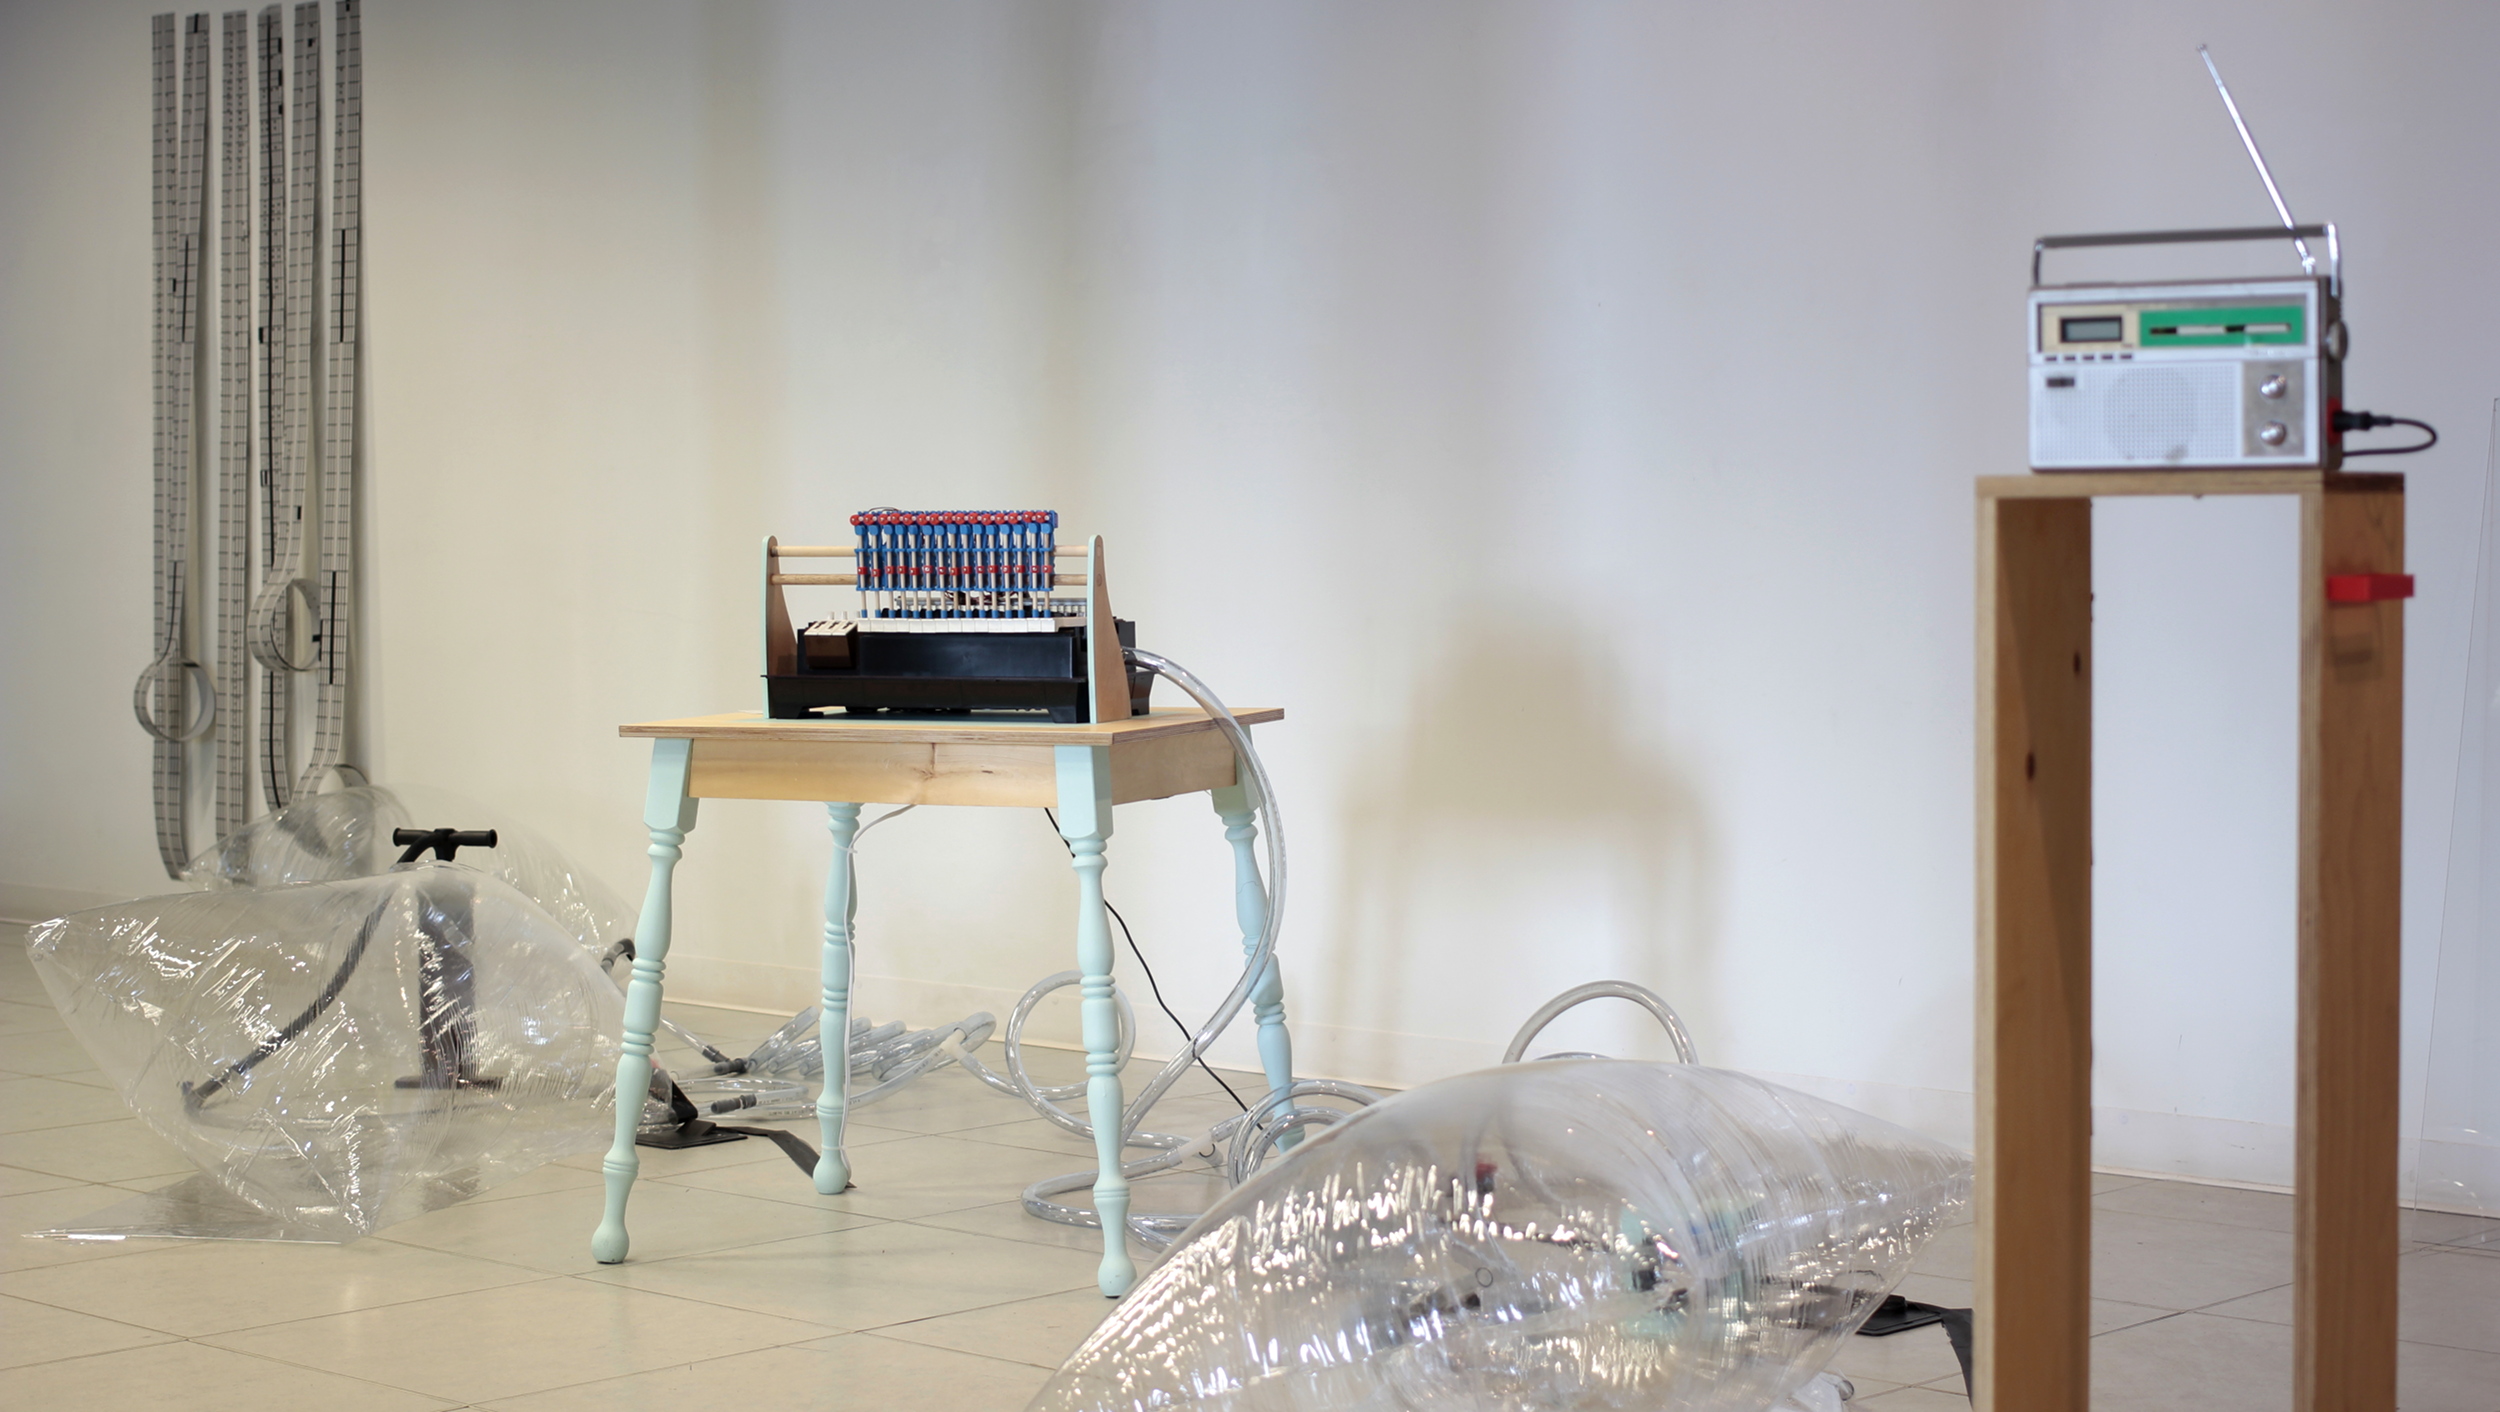
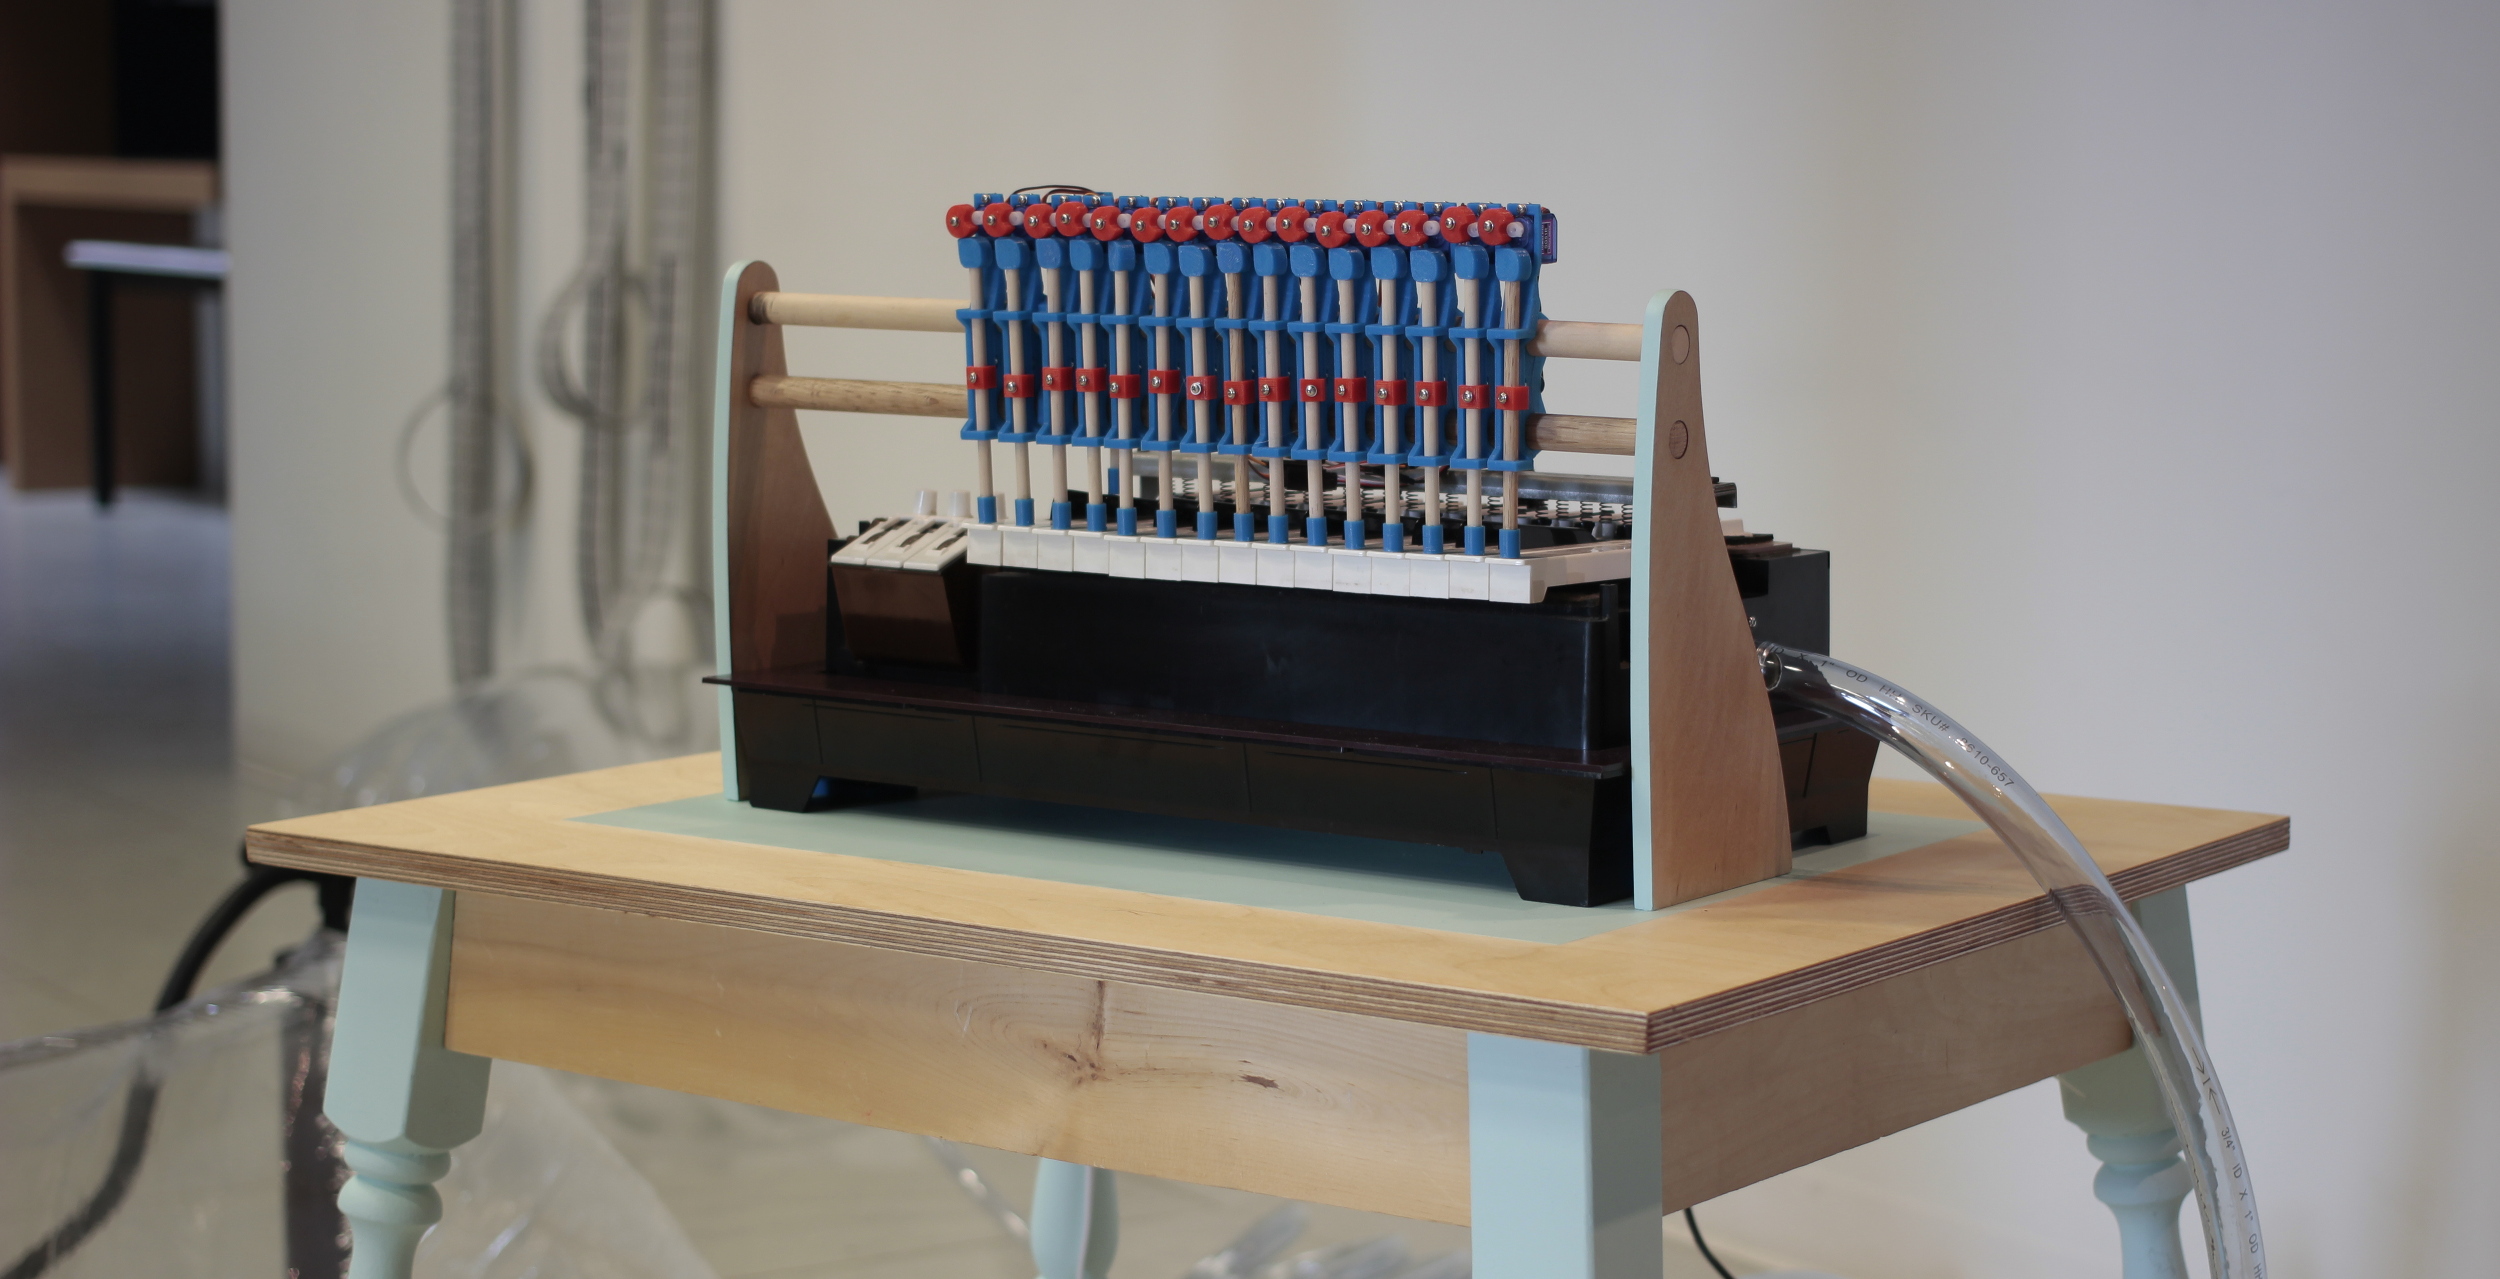
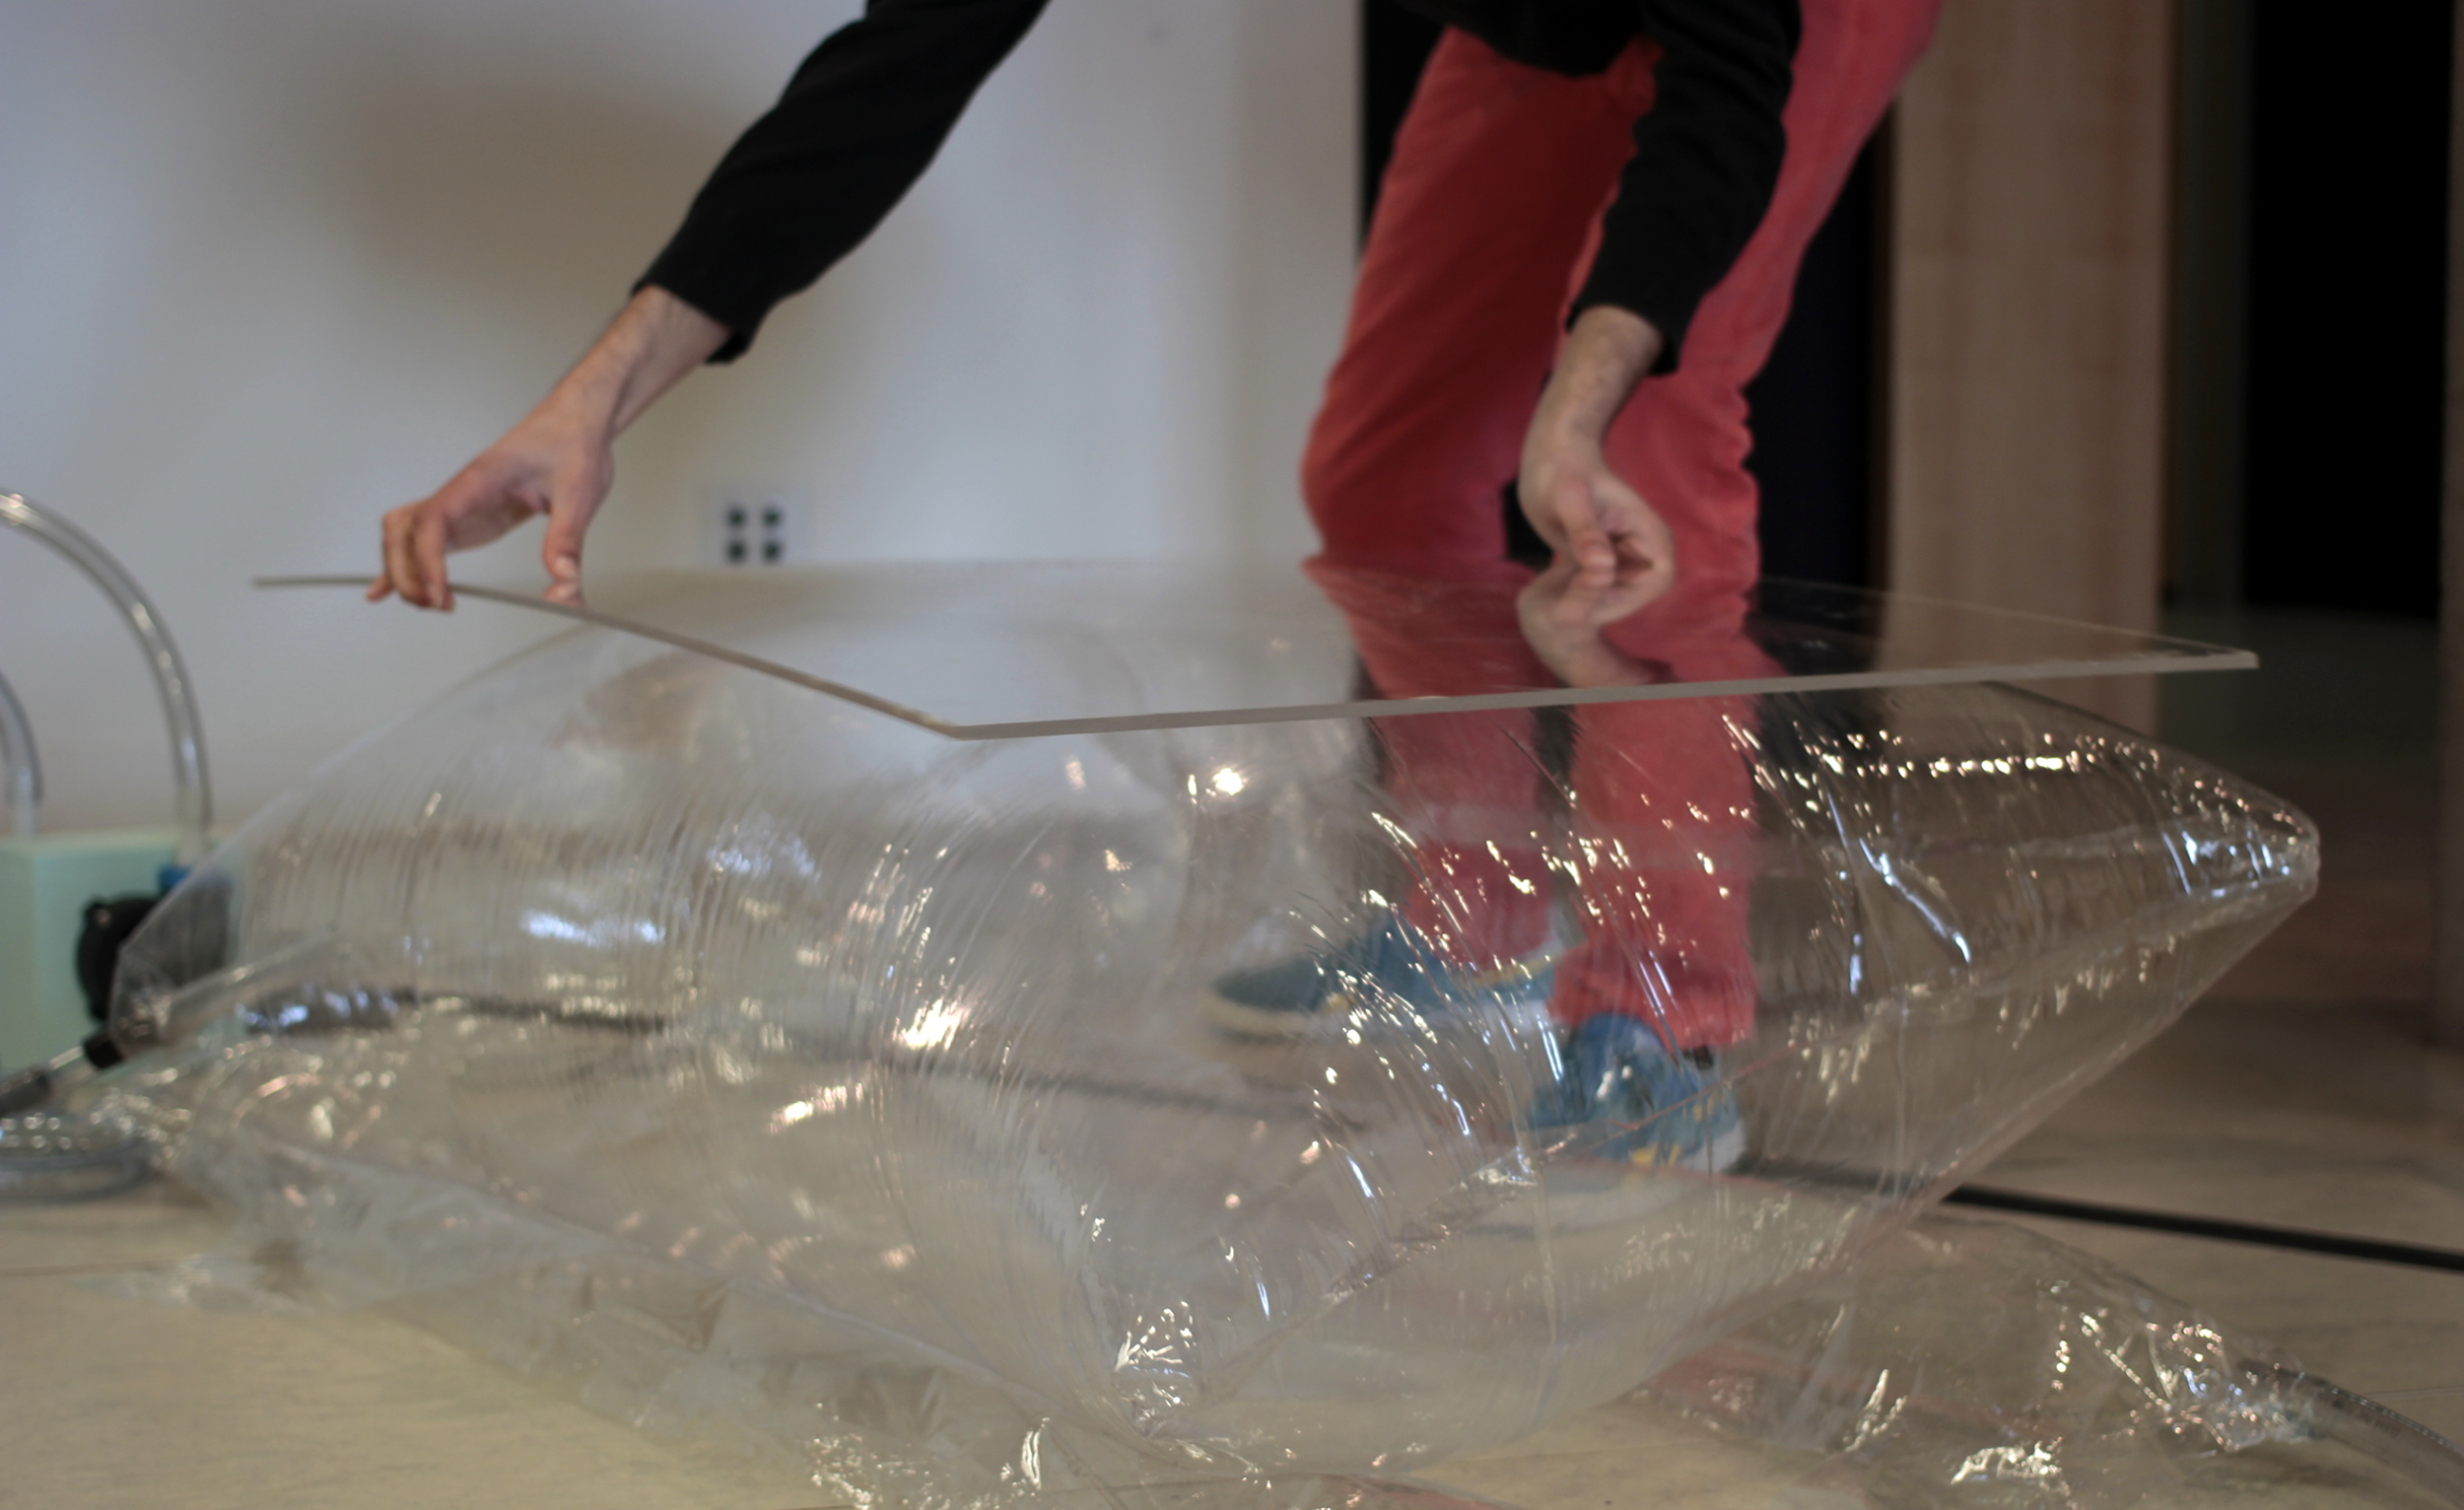
A non-exhaustive list of the materials involved includes: an FM radio, an electric chord organ, PVC tubes, rolls of hole punched paper, and large plastic pillows filled with air. Connected by a series of inputs and outputs, the system plays out an absurd comic moment where all of the machinery forces airflow and data into a small instrument, playing an indecipherable tune.

Beep-Boopatronics, the performance and installation Beep-Boopatronics, the performance and installation

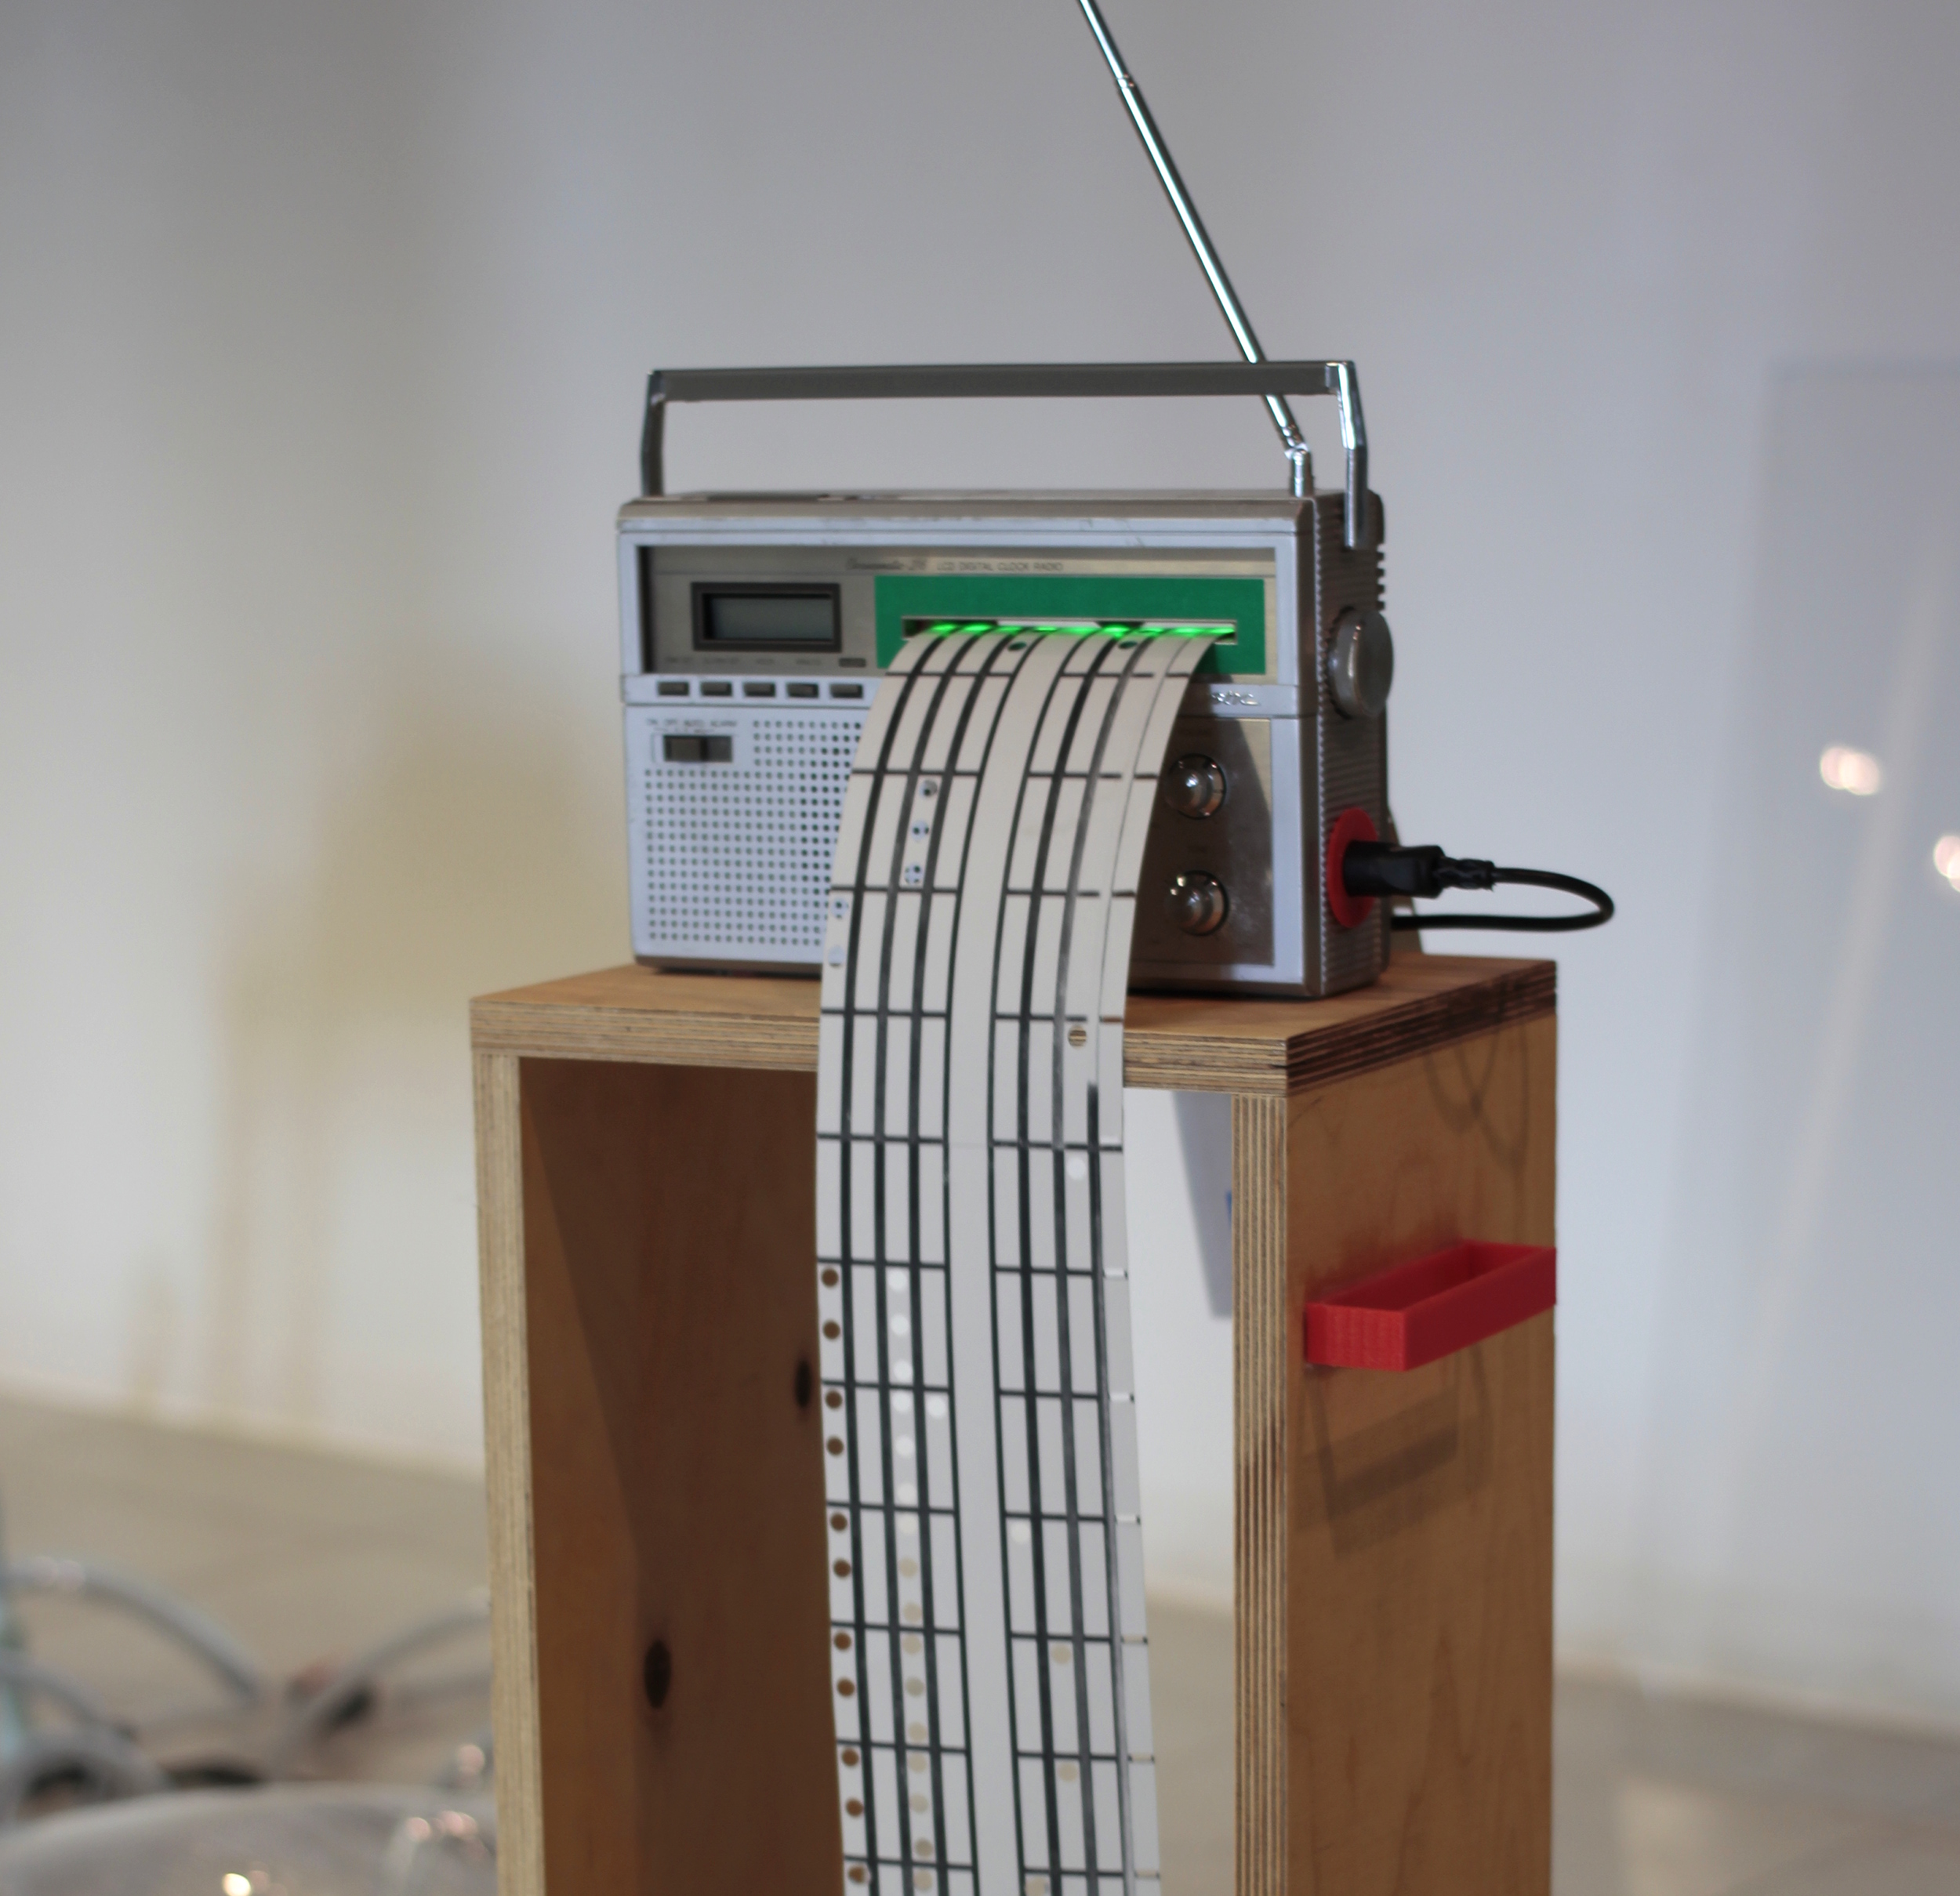
The objects in the exhibition are meant to be used in conjunction with each other, in order to make a large elaborate instrument. The instrument works a bit like this: the Beep-Boop Machine reads data in the form of punched rolls of paper, and converts that data into MIDI. The MIDI information is then sent along a cable over to the micro-controller which controls the servo motors. Eventually, the data is expressed when a specific servo motor depresses a key on the chord organ.

Separate from that, the chord organ also needs airflow in order to produce sound. Whether it is a manual hand-pump or the new set of external fans, airflow must be generated for the chord organ to make noise. The air stored in the air-pillows serves as a container for this energy to be deployed within the system, which can be manipulated to increase the volume of the organ.

Beep-Boopatronics, the performance and installation

But Does it Actually Work?

Yes! Below is a run through of what the installation looks like in action. There is also a much shorter version with more closeups here, and this is an example of the chord organ playing a composition by John Cage.

Bonus

For making it this far down the page here is a little looped excerpt from Charlie Chaplin's Modern Times. This clip as well as another scene were projected adjacent to the installation during the exhibition, as aa way to bring some frantic energy into the space if I wasn't there to pump air.

Beep-Boopatronics, the performance and installation

Read the whole story
mlupo
2867 days ago
reply
Beep-Boopatronics!
Canada
Share this story
Delete

Upcoming Exhibition: Beep-Boopatronics

1 Comment
Upcoming Exhibition: Beep-Boopatronics

In culmination of my studies at OCAD University, I will be having my MFA thesis exhibition on Saturday March 11th @ 49 McCaul Street, Toronto!

The exhibition Beep-Boopatronics is a project which takes nearly obsolete objects and imbues them with new, but not always useful, functionality. In particular, this exhibition takes a chord organ which plays itself, and connects it to a Beep-Boop Machine in order to examine how things can speak to each other.

WHEN

Opening reception: Saturday March 11th, 1:00pm - 4:00pm
The show runs from March 9th to 14th, 11:00am - 4pm

WHERE

The Open Space Gallery, 49 McCaul Street, Toronto

Read the whole story
mlupo
2895 days ago
reply
Upcoming art show!
Canada
Share this story
Delete

Newsletters in your NewsBlur

17 Comments and 34 Shares

It’s been three years to the day that Google Reader shut down. And here’s a feature they could never build. Introducing email newsletters in your RSS reader.

You can now forward your email newsletters over to NewsBlur and then read your email newsletters right in your browser/phone/TV/tablet. A couple dozen users have been beta testing this feature for the last couple of months and everybody agrees, this feature is amazing.

Newsletters are formatted to fit all of your screens, so it looks just as good on the web as it does on your phone.

Here’s the best part. If you get a lot of newsletters, you can group them into folders and even train them to highlight the newsletters you want to read first.

Setting up newsletters on NewsBlur is easy. Just follow the personalized instructions on the web by going to Manage > Email Newsletters on either the web dashboard or the manage menu.

You might ask why not just subscribe your custom NewsBlur newsletter email address directly to the newsletter instead of forwarding copies of the newsletter. The answer is that if you want a single source of truth for where newsletters are going, you want that in your email client and not on NewsBlur. If you ever change news readers (and with new features like this, why would you want to) you’ll want to change only a single filter rule instead of dozens of newsletter emails.

And with this huge new feature, NewsBlur just became even better. NewsBlur has branched beyond RSS for a while now, fetching Twitter and YouTube stories even without RSS. With newsletters, NewsBlur becomes your single source.

If you have suggestions on what NewsBlur can help you read next, post an idea on the Get Satisfaction forums.

Read the whole story
samuel
3126 days ago
reply
Keep the ideas coming. What's next, reading on a big screen perhaps?
Cambridge, Massachusetts
jbloom
3126 days ago
Weird request, Facebook/Instagram feeds. Both may be hard with Facebook's weird stances.
hansolosays
3125 days ago
nested folders would be nice? especially for newsletters
samuel
3122 days ago
You can move newsletters as you please, so they work fine with nested folders. New newsletters show up in the Newsletters folder, but they don't have to stay there.
chrisrosa
3114 days ago
ooo...an apple tv version would be interesting.
mlupo
3126 days ago
reply
My inbox thanks you!
Canada
popular
3126 days ago
reply
Share this story
Delete
15 public comments
mindspillage
3112 days ago
reply
Stuff like this makes me glad to be a paying user of NewsBlur.
north bay, California
jcherfas
3124 days ago
reply
Very interesting new feature: forward newsletter to #Newsblur. Will try soon.
claudinec
3124 days ago
reply
Wow!
Melbourne, Australia
egoexpress
3125 days ago
reply
Awesome feature! Have beta-tested it for a while now and love it!
49.46904200,11.11430400
pfctdayelise
3125 days ago
reply
!!
Melbourne, Australia
synapsecracklepop
3125 days ago
reply
I was one of those happy beta testers and am LOVING IT.

I ended up simplifying my process using a "+news" alias (so I subscribe with myemail+news@mydomain.com). I set up a matching filter to forward them to my NewsBlur email. Seamless!
ATL again
srsly
3126 days ago
reply
Woah, this feature is actually really sweet.
Atlanta, Georgia
jbloom
3126 days ago
reply
OH YES!!! 100% awesome!
Columbus, Ohio
sirshannon
3126 days ago
reply
There it is! Samuel dropped a hint yesterday, I was hoping it was something like this. I like that it is implemented in a way that doesn't just take over all responsibility for the newsletters.
economyaki
3126 days ago
reply
whoa
nyc
lelandpaul
3126 days ago
reply
Whaaa - truly a killer feature I didn't even know I needed
San Francisco, CA
adamcole
3126 days ago
reply
Oy, this is awesome.
Philadelphia, PA, USA
hansolosays
3126 days ago
reply
AWESOME!
Norfolk, Virginia
jqlive
3126 days ago
reply
Thank you!
CN/MX
chrisrosa
3126 days ago
reply
wow...this is great news.
San Francisco, CA

Just Another Beep-Boop Machine

1 Comment
Just Another Beep-Boop Machine

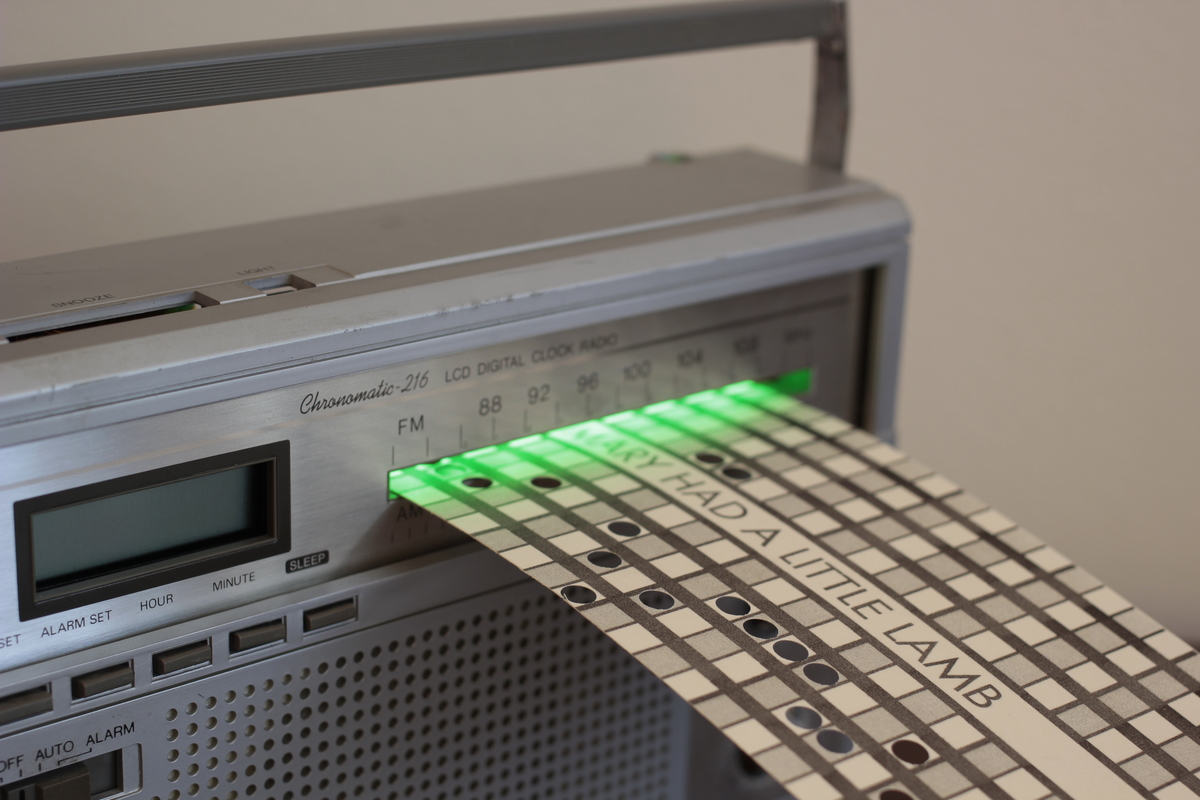
Just Another Beep-Boop Machine is a small artwork, made to create an opportunity to play with music. A participant can punch holes in the provided cards, which are then used as the input information for the device to play a tune, as can be seen in the video above.
Just Another Beep-Boop Machine The cards can be used to reproduce familiar songs, or to just punch as many holes as you can, to see what happens.
How it works

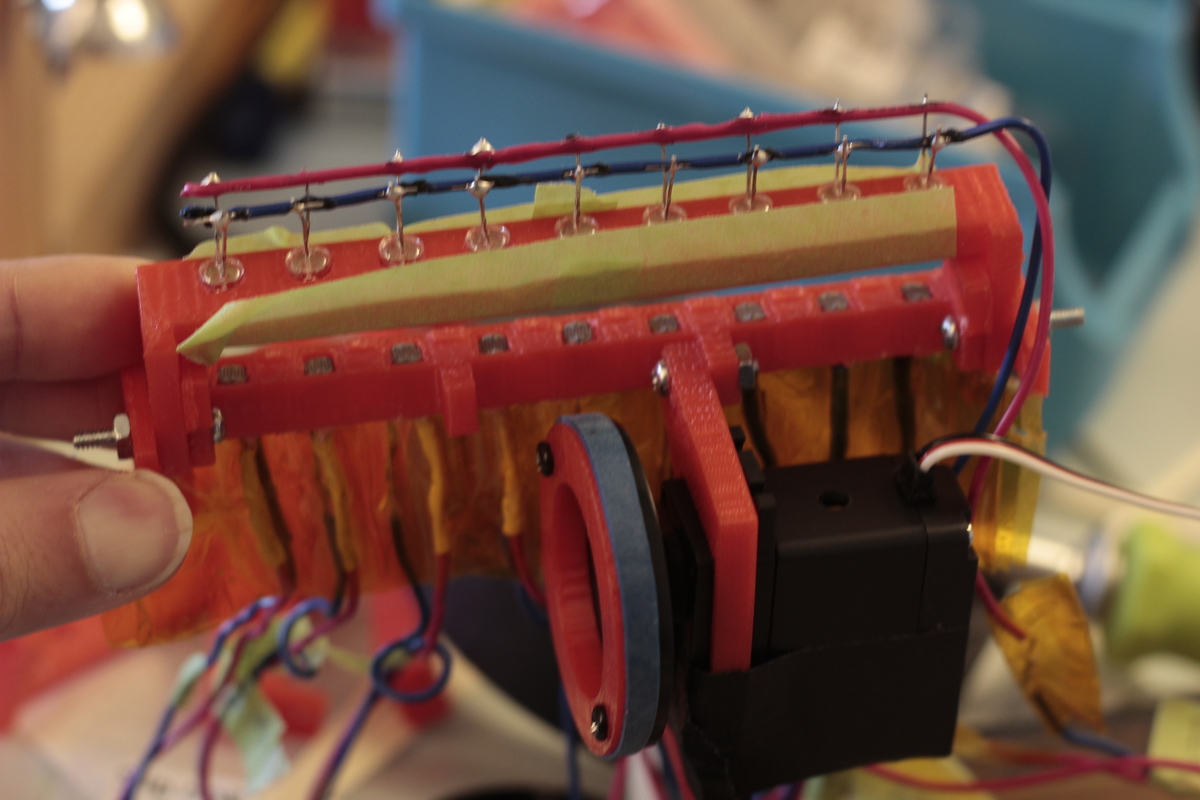
The glowing green light emanating from the mouth of the device is actually a key part of its function: the holes punched into the cards allow the light to hit a corresponding sensor, which signals the microcontroller to play the requisite note. When the card is inserted, it covers the center light sensor, triggering the movement of the servo which draws in the card to play the song.

Its guts kind of look like this:
Just Another Beep-Boop Machine There you can see the array of LEDs, and photo-resisters which activate the sound. Not pictured is the microcontroller brain, which for this project was an Espruino Pico, flashed with MicroyPython (a process I detail here).
How To

I can not promise that this will be a comprehensive guide, but it should be a good foundation for you to try a similar project.

First some preliminary steps:
1. Grab all of the project's 3D models and assets from Thingiverse (don't forget to download the card templates from here as well!)
2. Get the source code for the project here
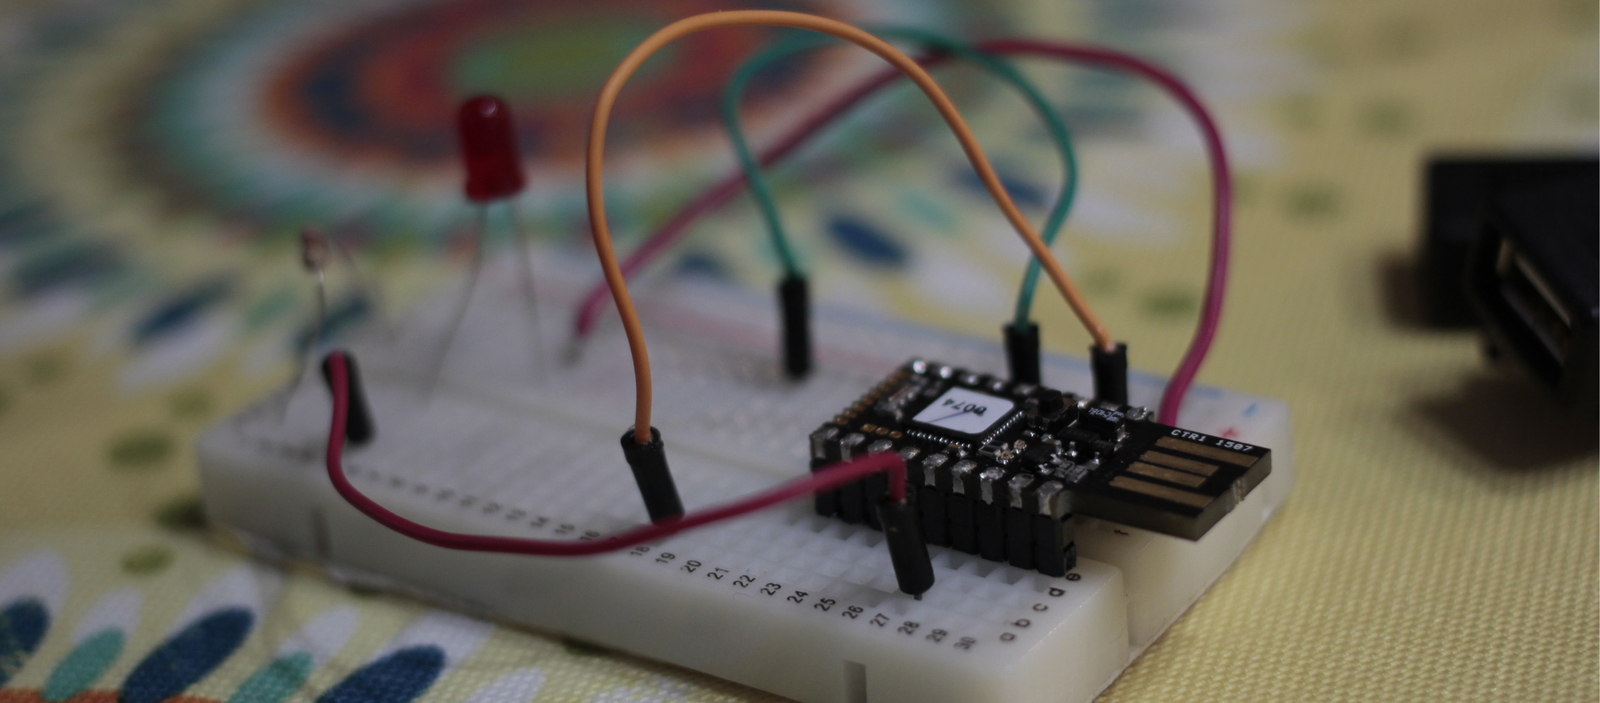
3. Review how to wire up a photo-resistor to a micocontroller from this post (though that code example is for an Arduino)

The 3D model file LED-holder.stl is the top mount for the LEDs, and will need to be 3D printed. For this project I used something similar to these (which were actually just a bit too bright). The LEDs just need to be mounted into this holder, and then wired in series to the microcontroller.

The file sensor-holder.stl, as you can guess, will hold the light sensors. Each needs to be mounted, and then wired to a specific pin on your microcontroller. For this project, the sensors are being used as a simple on-off switch, instead of sending analogue information. This makes the project a bit more flexible, as it does not require a crazy amount of analogue pins. The sensor-holder.stl and LED-holder.stl need to be connected with a 4-40 bolt on each side.

The servo is held in place by servo-mount-no-holes.stl, but the 3D-printable file does not have holes to bolt the servo in place, and so those will have to be drilled in later (...or you can just affix the servo to the mount with some tape, while you are adjusting its placement). The exact servo I used was this one, but just about any continuous rotation servo of a similar size should work. Once in place, attach the ring.stl to a servo disc, and then slide on an elastic band for some grip. The one sort of tricky thing is that you will have to find a way to put some pressure on the wheel, in order to drive the card through.

The Code

As mentioned above, the code runs on a microcontroller running MicroPython, and the script can be found here. You just need to wire up the components to the pins outlined in the code (or equivalent for different boards), and upload the main.py onto your device.

Really though, this project can be done on almost any microcontroller, as long as you write a script with similar logic. Basically, the main.py script just does this:

  1. Initialize the pins corresponding to the light sensors as inputs.
  2. Set up a PWM pin to output to a speaker or piezo buzzer.
  3. Create a function which takes the pin receiving light, and then activates the piezo to play the corresponding note.
  4. Wrap this all up in a loop that checks to see which pins are full of light, and then act accordingly.
Read the whole story
mlupo
3256 days ago
reply
A recently completed project of mine!
Canada
Share this story
Delete

Fun With Microcontrollers: installing MicroPython on the Espruino Pico

1 Comment
Fun With Microcontrollers: installing MicroPython on the Espruino Pico

Recently, I became quite interested in a new microcontroller called the pyboard (US|UK) which "is a small electronic circuit board that runs Micro Python on the bare metal, and gives you a low-level Python operating system that can be used to control all kinds of electronic projects".1

I've completed a number of projects with the Arduino, and Raspberry Pi, but I am particularly excited by MicroPython and the pyboard as they fit a great niche: the ease and flexibility of the Python programming language on a small and power efficient microcontroller. The only downside is that in September I will once again be tight on funds, as I am heading back to art school for one last last time again. As a result the pyboard's $44.95 USD price tag from Adafruit felt like a bit too much to spend on a fun experiment, without having a specific use in mind...

...buuuuuuuuuuut, after comparing the list of boards that MicroPython has been ported to, with what else is for sale on Adafruit, I found the Espruino Pico: an even tinier microcontroller for sale for only $24.95 USD! Of course, the lower price tag comes with comparably less functionality than the pyboard (the official pyboard is quite feature packed!), and also includes the burden of having to manually install MicroPython on the Espruino Pico.

Time to Install MicroPython on the Pico!

I've updated this post with instructions for two different ways to achieve our goal. In this post I'll start with the 'easy way', which will get us up and running a bit quicker. However, the second 'hard way' (I mean, it has a few more steps) is useful if you plan on hacking on the C code. In any case, both are kinda fun!

The Reasonably Easy Way

This set of instructions avoids the installation of alot of additional software, and removes the need to compile things from source. But still, before the real fun can begin we have to do a quick modification to our Espruino Pico.

Step 0: Preparing the board

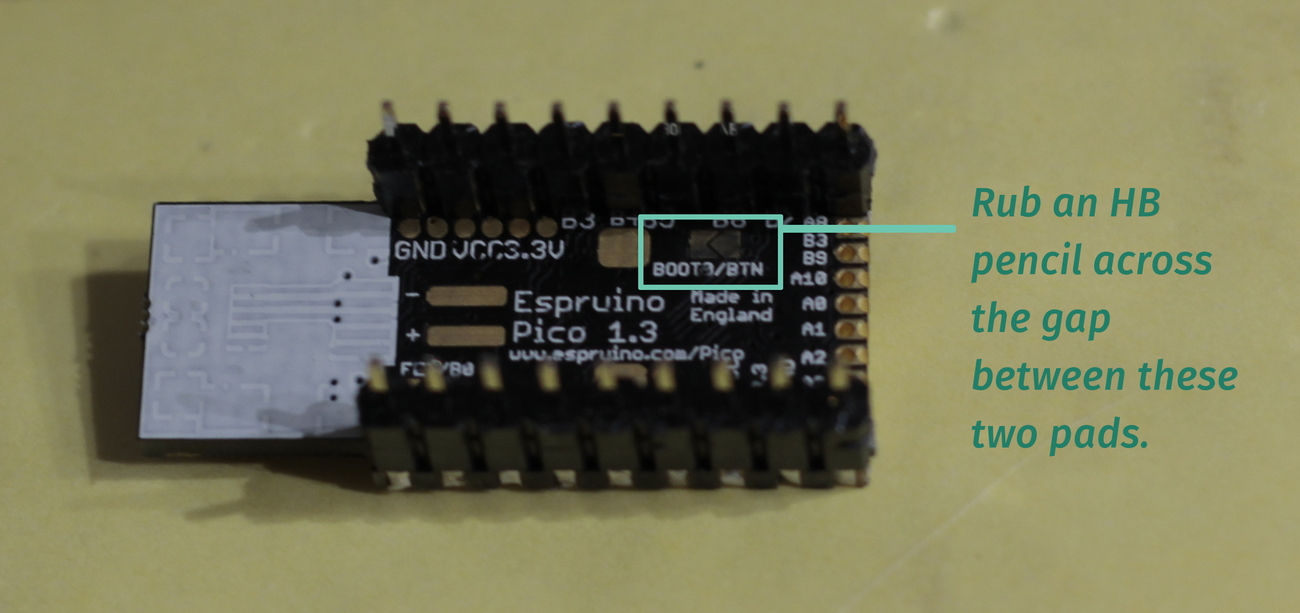
To install new firmware onto to the Espruino Pico, we first need to figure out how to put the board into 'Device Firmware Upgrade' (DFU) mode. On the bottom of the board there is a set of BOOT0/BTN pads.
Fun With Microcontrollers: installing MicroPython on the Espruino Pico Shorting out this connection by rubbing an HB pencil across the gap will connect the push button on the top of the board to BOOT0. As a result, when you press the button and plug the board into a USB port (while continuing to hold down the button), the board will power up in DFU mode. Woo! If you would like some additional help programming the Pico, you can review the 'Advanced Flashing' section of this page.

Step 1: Getting the Software

If you visit https://micropython.org/download/ you will see a recent snapshot of the MicroPython software available to download. Additionally, at the bottom of the page there happens to be a 'Firmware for other boards' section, which includes a link to download a pre-built firmware image for the Espruino Pico!2 SO, grab a copy of each, and we can get started.

Take your micropython-master.zip file and extract it to your home directory. Then, in ~/micropython/tools you will find the file pydfu.py. This python script does rely on two dependencies that you may not have installed: pyusb, and libusb. If you are on Debian/Ubuntu you can solve this by running sudo apt-get install python-usb python3-usb, which will pull in libusb as a dependency.

For alternative instructions you can follow along here, and it should all work out okay. As of this writing, the most recent firmware file for the Pico is espruino-pico-2015-08-12-v1.4.5-1-gb7d5906.dfu, and so that is what I will use in the example below.

Step 2: Upload the Software

Move your firmware file to ~/micropython/tools, and in your terminal change your current working directory with a quick:

cd ~/micropython/tools

Now we just need to run:

sudo ./pydfu.py -u 'espruino-pico-2015-08-12-v1.4.5-1-gb7d5906.dfu'

If that completes successfully, then we did it! If things didn't quite work out then you may:

  • not have properly put the Pico in DFU mode
  • not have the right permissions to complete the above command
  • have done everything right, but still strange things happen for some strange reason

If strange things are happening, then it might be useful to take another look at the 'Advanced Flashing' section of this page, or do a search on the MicroPython forum.

Anyway, now that we've installed MicroPython you can go on ahead to the Testing it Out section of this blog post, and do fun things!

The Harder-ish Way

If you would like to compile the project from source, and do things manually, the MicroPython dev wiki does include just about all the info you would need to get the job done, but if you're new to the project the necessary information is split across a few different pages. Really, this entire blog post is just a compilation of the wiki's material, using slightly plainer language, mostly so that I can keep a record for myself all in one place for future reference.

To get things started, take a look way up at Step 0, to get your Pico ready to be programed.

Step 1: Preparing your computer

Before we can do anything really exciting, we have to install some software. I am using Debian 8 for this process, but it should be similar for recent Ubuntu versions. Note that the bulk of the text for this section was abridged from this page of the wiki.

  • Install dfu-utils

sudo apt-get install dfu-util

  • Create a udev rules file.
    • run sudo nano /etc/udev/rules.d/49-stmdiscovery.rules in your terminal, and enter the following contents:
# f055:9800 - STM32F4 Discovery running MicroPython in USB Serial Mode (CN5)
ATTRS{idVendor}=="f055", ATTRS{idProduct}=="9800", ENV{ID_MM_DEVICE_IGNORE}="1"  
ATTRS{idVendor}=="f055", ATTRS{idProduct}=="9800", ENV{MTP_NO_PROBE}="1"  
SUBSYSTEMS=="usb", ATTRS{idVendor}=="f055", ATTRS{idProduct}=="9800", MODE:="0666"  
KERNEL=="ttyACM*", ATTRS{idVendor}=="f055", ATTRS{idProduct}=="9800", MODE:="0666"  
# 0483:df11 - STM32F4 Discovery in DFU mode (CN5)
SUBSYSTEMS=="usb", ATTRS{idVendor}=="0483", ATTRS{idProduct}=="df11", MODE:="0666"  

That is the udev rule for the 'STM32F4 Discovery Board' from the MicroPython dev wiki linked above, I think it works in our case because the Discovery Board has the same usb vendor-ID:model-ID as the Espruino Pico. Or something.

  • Tell udev to reload its rules: sudo udevadm control --reload-rules

With this rule in place, we will not need to use sudo to deploy the firmware later on.

Step 3: Preparing the software

So. In order to put new firmware onto our Pico, we need to install some more additional software, and get the MicroPython software first.

You will need the following packages:

  • build-essential
  • libreadline-dev
  • libffi-dev
  • git
  • gcc-arm-none-eabi
  • binutils-arm-none-eabi

You can install these packages by running:
sudo apt-get install build-essential libreadline-dev libffi-dev git gcc-arm-none-eabi binutils-arm-none-eabi. This will also probably pull in a bunch of dependencies.

Note that the gcc-arm-none-eabi binutils-arm-none-eabi packages are needed as we will require an ARM compiler. More info here if needed.

Now, we can get the source for MicroPython by running:
git clone https://github.com/micropython/micropython.git

Once that is finished, to build for our platform we need to enter the directory for the stmhal port:
cd ~/micropython/stmhal/

Step 4: Do the thing!

And now, we are finally at the point where we can do the thing that we came here to do!

To compile the firmware we just have to run: make BOARD=ESPRUINO_PICO from within the ~/micropython/stmhal/ directory.

If you recall from way up in Step 0, now is definitely the time to put the board in DFU mode by shorting out the BOOT0/BTN pads, and plugging the board into your computer while holding down the button on the top of the board.

Aaaaaaaaand now you just need to run:

make BOARD=ESPRUINO_PICO deploy

If all goes well, your terminal output should look something like this (be patient, this may take a while!):
Fun With Microcontrollers: installing MicroPython on the Espruino Pico

If this didn't work, it could be because:

  • you don't have the packages installed to cross-compile for ARM
  • the board was not powered on in DFU mode
  • the udev rules thing didn't work out, in which case you can try sudo make BOARD=ESPRUINO_PICO deploy
  • there is a mysterious problem which is mysterious.

If you run into a mysterious problem, review the full instructions for the Discovery Board. Or, take a look at Step 2 of the 'easy way', and see if that works better for you.

Testing it Out!

If the previous steps for either method all went smoothly, we can test out the board by unplugging it, and plugging it back in. If your computer mounts the board as a storage device named 'PYBFLASH' it all worked out! In your terminal you can now enter screen /dev/ttyACM0 (may need to be run as sudo, depending on your setup) to access the python interpreter running on the board itself! In the interpreter, some quick example code is:

>>> import pyb
>>> led = pyb.LED(1)
>>> led.toggle()

This will turn on the Pico's red LED. You can also run a script in the root of the PYBFLASH directory as soon the board boots up, as long as it is named main.py. You can read way more about all this on the MicroPython docs: http://docs.micropython.org/en/latest/. When you're reading the docs, the examples sometimes give reference to the pin names for the pyboard, but the Pico has a whole different set of names which you can review here: http://www.espruino.com/Pico. For example, in the fading LED tutorial instead of assigning the LED + timer on pin X1, you could use pin B13.

Wrapping up

When it comes down to it, microcontrollers are fun, python is fun, and the two of them together should be super-great. I am a big fan of the MicroPython project and I do encourage you to check out the pyboard (US|UK) as it is an all around more capable device than the Pico: the official pyboard has more storage, more ram, accelerometers, and etc.! However, it seems that for artists and students there is something of magic microcontroller price-point around $24-$30 USD, and so if flashing the Pico gets MicroPython in more people's hands...then that's great!


FINAL NOTE: If any of the commands/advice/whatever from this blog post cause you or your electronic devices any harm of any kind: I AM TOTALLY NOT RESPONSIBLE.

  1. This quote, an explanatory video, tutorials, and more can all be found at micropython.org!

  2. Thank you to Damien who pointed out to me that pre-built firmware for the Pico can be found on this page.

Read the whole story
mlupo
3447 days ago
reply
I am very interested in MicroPython, and the Espruino form factor is super-neat, sooooooo what could be better than the two together?
Canada
Share this story
Delete
Next Page of Stories